Winterize Your Plumbing and Prevent Frozen Pipes
During the winter months, the risk of frozen pipes and damage to your plumbing system increases significantly, posing a threat to homeowners and renters alike. You may already be worried about winterizing your car, finalizing holiday menus, or finding that perfect present for your loved ones, and the last thing any of us needs is the added stress of frozen and burst pipes. Understanding the risks that cold weather poses to your home is the first step in preventing damage and adding costs to an already-expensive time of year. In this guide, we will discuss how frozen pipes can impact your home and show you how to winterize and troubleshoot common problems.

Understanding the Risks of Frozen Pipes
Many of us may remember our parents telling us to make sure to let the faucets drip when cold temperatures were expected, or even remember waking up to take a shower only to realize no water was coming out of the showerhead. Cold temperatures can cause pipes to freeze, which can lead to a whole host of issues, including burst pipes, leaks, and even water damage to your home.
When temperatures drop below freezing, the water inside pipes becomes vulnerable to freezing. This can occur both in exposed pipes (like those in basements or attics), as well as in the pipes located in the walls of your home and in the ground outside. When water freezes in these pipes, it expands and increases the pressure in the plumbing network. Increased pressure can lead to burst or cracked pipes, which can result in leaks and flooding when the ice thaws back into water. If the force of the burst is powerful enough, it can lead to extensive and immediate water damage, which costs a lot of money to fix. In addition to burst pipes, frozen water can restrict water flow, which inhibits activities like cooking, cleaning, and bathing.
Potential Damage and Costs
When a pipe bursts due to freezing, the sudden release of water can flood your home, causing damage to not just walls, ceilings, and floors, but also to your personal belongings. The damage is not only expensive to fix, but can sometimes result in the loss of beloved items like photographs or memorabilia.
Repairing or replacing burst pipes is complex, and requires not just locating the break and replacing the pipe, but also can include locating and repairing structural damage to the home. In many cases, multiple professionals will need to work together to locate the source of the leak, repair the pipes, replace walls, ceilings, floors, and remediate the home. If the damage is extensive enough, you may even have to temporarily relocate while work is done on the home, which adds its own set of additional expenses and stressors into an already stressful situation.
In addition to the immediate effects of a burst pipe, water damage can also cause long-term consequences such as mold and mildew growth, which pose health risks to you and your loved ones if not addressed quickly and completely.
How to Winterize Your Plumbing
By winterizing your plumbing before temperatures plummet, you can take significant steps to reduce the risk of leaks and floods in your home, helping you to gain peace of mind as winter approaches. Winterizing your plumbing typically involves insulating pipes, draining your water system, and sealing off access points. These measures help to keep your pipes warm and prevent cold air from entering your plumbing system.
Insulating your pipes is crucial to help protect them from freezing. You have several options to help insulate your plumbing, including foam pipe insulation or heat tape. Insulation acts as an added layer of protection, helping to contain heat in the pipes and keep out the cold. There are other methods in addition to or in lieu of insulating that you can also utilize to winterize your plumbing.
Draining your water system or sealing off access points are also important steps you can take to prepare for cold weather. To properly drain your water system, begin by shutting off the main water supply to your home. Then, turn on your faucets, flush toilets, and run your dishwasher and/or washing machine to empty your home’s pipes and appliances of all remaining water. By eliminating the water from your pipes and appliances, you reduce the risk of freezing and damage to your plumbing.
To seal off access points, check for any gaps or cracks in your walls, floors, or foundation where cold air can enter. Seal them with caulk or weatherstripping, and pay close attention to areas around pipes that enter your home (like where the water line comes in, or where plumbing vents exit the roof). Sealing these points properly acts as a form of insulation and helps create a barrier between the cold air and your homes interior.
What You’ll Need
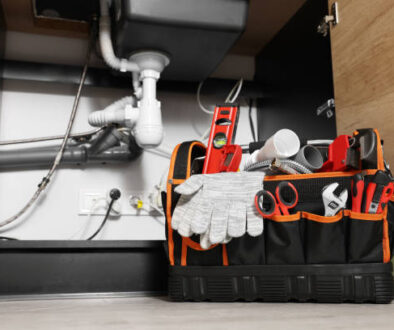
To winterize your plumbing, you will need a few essential tools and materials, including:
- Pipe insulation: Foam pipe insulation or heat tape to wrap around exposed pipes. When selecting pipe insulation, it’s important to choose the correct size and material. There are various types of insulation available, such as foam, rubber, and fiberglass. Foam insulation is a popular choice due to its affordability and ease of installation.
- Pipe wrench: Used to tighten or loosen fittings on pipes.
- Bucket: Useful for catching any water that may still be in the pipes during the draining process.
- Checklist: A handy list to ensure you cover all the necessary steps and don’t miss any important details.
Having these tools and materials ready before you begin the winterizing process will make the task more efficient and ensure that you have everything you need to protect your plumbing system.
Remember, winterizing your plumbing is a proactive measure that can save you from the hassle and expense of dealing with frozen pipes. By taking the time to insulate, drain, and seal off access points, you can enjoy peace of mind throughout the winter season, knowing that your plumbing system is well-protected.
Step-by-Step Guide to Winterize Your Plumbing
Winterizing your plumbing is a straightforward process that can be broken down into several key steps. By following this step-by-step guide, you can protect your pipes from freezing and avoid costly repairs and remediation.
1. Insulating Your Pipes
The first step to winterization should be insulating your pipes. To do this, locate pipes exposed to cold temperatures and unheated areas of your home. Clean the pipes thoroughly to remove dirt and debris, which could hinder the adhesive properties of heat tape and cause you to have to re-do the insulation. Once you have cleaned the pipes, measure their length and cut the insulation to fit. Wrap the insulation around the pipes, being careful to close any gaps or exposed areas. You can also insulate valves and fittings, as they are vulnerable areas often overlooked.
2. Sealing Off Access Points
Next, it’s important to seal off access points that could allow cold air to enter your plumbing system. Inspect your home for any cracks or gaps near pipes, and use caulk or insulation to seal them properly.
Start by checking areas where pipes enter your home, such as the foundations and walls. Look for visible gaps or openings and apply caulk to seal them. Specifically pay attention to areas where pipes pass through exterior walls.
Additionally, you should inspect areas around windows or doors. Apply weather stripping or caulking to seal gaps and prevent drafts. You can also purchase heavy curtains and draft stoppers for windows and doors that are easy to install and remove before and after winter. Minimizing the amount of cold air that can enter your home will go a long way to winterizing your plumbing and saving you money in the long run.
3. Draining Your Water System
Finally, you’ll need to drain your water system to eliminate any water that could freeze and cause damage. Begin by turning off the main water supply and then open all faucets and fixtures to allow the water to drain completely. It’s important to note that some fixtures, like outdoor faucets and sprinkler systems, may have a separate shut-off valve. Make sure to locate each shut-off valve and close them to prevent water from entering the system.
Once you have closed each shut-off valve, simply run each faucet and empty all appliances (including toilets!) as mentioned above. To ensure your toilets are fully drained, simply hold down the flush level until the tank is empty. This is a crucial step in draining the water system of your home, as even a small amount of water left in the tank or bowl can freeze and cause cracks or leaks.
If you have a hot water tank, you should also drain it to ensure it is protected and optimize performance when winter is over. Simply follow the manufacturer’s instructions in the manual to safely drain the tank and prevent damage.
Catch up on our latest posts:
Maintaining Your Plumbing Throughout Winter
Once you have winterized your plumbing, it’s essential to continue with regular checks and maintenance throughout the winter season. By staying vigilant, you can quickly address any issues that may arise and prevent them from turning into major problems.
Regular Checks and Maintenance
Remember to check the seals and insulation throughout the winter season. Over time, caulk may shrink or crack, and insulation may become worn or damaged. By promptly addressing any issues, you can ensure that your plumbing remains well-protected throughout the winter.
Regularly inspect your pipes for any signs of leaks, cracks, or damage. Even a small leak can quickly escalate into a major issue if left unattended. Look for water stains on walls or ceilings, damp spots on the floor, or any unusual odors that may indicate a problem.
What to Do in Extreme Cold
Remember to keep an eye on the weather forecast and take appropriate action when extreme cold is expected. By taking preventive measures, such as leaving faucets dripping and insulating outdoor faucets, you can protect your plumbing system from the harsh winter conditions. In extremely cold temperatures, taking extra precautions is necessary to protect your plumbing system.
To prevent freezing, keep your home well-heated throughout the winter. Maintaining a consistent temperature, even when you’re away, can help ensure that the pipes stay warm and prevent them from freezing. If you’re concerned about energy consumption, consider using a programmable thermostat to regulate the temperature efficiently.
You can also open cabinet doors under sinks to allow warm air to circulate around the pipes, reducing the chances of freezing. Using heat tape or portable heaters can provide additional warmth in areas where pipes are at the highest risk of freezing.
Troubleshooting Common Winter Plumbing Issues
Despite your best efforts, sometimes issues can still arise during the winter months. Knowing how to troubleshoot common winter plumbing problems can help you minimize damage and resolve issues promptly.
Dealing with Frozen Pipes
If you discover that your pipes are frozen, it’s important to act quickly to prevent them from bursting. Turn off the main water supply immediately to minimize any potential damage. Thawing the pipes can be done using a hairdryer or warm towels, but avoid using open flames or high heat sources.
Addressing Leaks and Drips
In case you notice any leaks or drips, it’s crucial to address them promptly to avoid water damage and further plumbing issues. Inspect the affected area and tighten any loose fittings. If necessary, replace worn-out gaskets or call a professional plumber for assistance.
By following these guidelines and taking the necessary precautions, you can successfully winterize your plumbing and prevent frozen pipes. Remember that an ounce of prevention is worth a pound of cure, so invest the time and effort in protecting your plumbing this winter.
Resources and Citations
The following resources were used to inform the content and provide further reading on winterizing plumbing:
-
Guide: How to Winterize Your Plumbing Pipes to Prevent Damage (Reddit)
-
Winterization and Tips on Prevention of Winter Damage (Bear Valley Water District)
-
5 Ways To Prevent Your Pipes From Freezing Without Heat (Young House Love)
-
Plumbing Winterization Tips Found During Inspections (Housemaster Blog)
Key Takeaways
-
Proactive Defense is Non-Negotiable: A frozen pipe that bursts creates immense pressure, leading to catastrophic flooding, structural damage, potential mold growth, and complex, multi-professional repair costs that far exceed the price of prevention.
-
Master the 3-Part Winterization Plan: Successful protection is built on three pillars: Insulate all pipes exposed to cold air (especially valves and fittings), Seal exterior access points with caulk or weatherstripping, and Drain your water system completely after shutting off the main supply.
-
Use House Heat as a Shield: During extreme cold, maintain a consistent indoor temperature and open cabinet doors beneath sinks to circulate warm air directly onto vulnerable plumbing lines.
-
The Critical Emergency Response: If you suspect a pipe is frozen, immediately shut off your main water supply to minimize water damage upon thawing. Thaw the pipe safely using only a hairdryer or warm towels—never use open flames or high heat sources.
-
Ongoing Vigilance is Key: After winterizing, regularly inspect existing seals and insulation for cracking or wear. Promptly address any leaks or drips, as even small issues can rapidly escalate in cold conditions.
Prevention is the best strategy
Taking the time and effort to prepare your plumbing system for winter can save you from the stress, expenses, and disruptions caused by frozen pipes. Should the worst happen and you find yourself in need of plumbing repair or service, please don’t hesitate to reach out. Stay warm and safeguarded this winter season!
FAQs
-
You should keep your indoor temperature at no less than 55°F (13°C). This ensures that warm air reaches pipes in hidden areas, like cabinets and walls, keeping them above freezing.


